Tuesday, 28 August 2012
Back to School
Welcome back! I hope you all had a nice long holiday weekend. We celebrated the August bank holiday here in the UK, and Labor Day is just around the corner for America. Both holidays signify the end of summer break, and that can only mean one thing.... back to school.
I don't have kids yet, so I could choose to ignore this time of year all together. But my love for the back-to-school season actually has me jealous of all those kiddos! I love it! New coloured pencils, all the same height. Textbooks freshly covered with paper bags from the market. Even a new book bag, if you're lucky enough.
Despite going full-time at work this week, I signed up for two online courses just so that I could go "back to school" too! The first course is through this really amazing website called Coursera. Known as higher education that overcomes the boundaries of geography, time and money, it offers a smattering of classes online that completely free and taught by world-renowned professors. I started an Introduction to Sustainability course today, and I'm hoping that it complements my work as a Corporate Social Responsibility practitioner. Depending on the weight of the coursework, I'll be starting A History of the World next month - a class that my dad in Texas has promised to "attend" with me!
Now, I tried to sign up for a spinning (as in wool) class at my local adult education centre, but the classes filled up really quickly! So I opted for a much more convenient and much less expensive way to learn the craft - through Craftsy. I took a free Know Your Wools class last week, and enjoyed it so much, that I have now paid for Spindling: From Fluff to Stuff. I'll post a thorough review soon.
If you happen to catch the back-to-school buzz too, then I highly recommend you check out these courses. They're convenient and inexpensive, if not free. You're never too old to learn something new. And please do share your recommendations for more online learning (craft-related or otherwise) in the comment box below!
Thursday, 23 August 2012
My Orimono
Olly and I have been married for exactly 11 months today, and I'm just now getting around to making covers for two lovely John Lewis feather cushions that we received as wedding gifts. Now that I have my desk and my own crafting space firmly stamped out a corner of our bedroom, I have no excuse not to finish a few projects that were been sorely neglected during the months that we lived with my mother-in-law.
I'm really trying to whittle down my crafty stash, and that includes the millions of fabric scraps that I am so reluctant to throw away. I've sewn a few patchwork soccer/footballs for baby friends, and I just learned this week that there is yet another one the way. Fortunately I have until march 2013 to craft up a storm for that little one!
Another great stash-buster is a DIY version of Anthropologie's famed Orimono cushion. When I was first building my blog a few months ago, I stumbled across many tutorials for Orimono knock-offs on DIY and sewing blogs. My favourite is on the Mad Mim blog, and another great interpretation is found on Mosaic Rose.
I'm not going to give a tutorial myself, as there are at least half a dozen already on the web. I will say that I would have preferred to embroider a satin stitch around each petal (fabric scrap). My simple machine doesn't have this feature though, so I did a blanket stitch by hand using two strands of embroidery floss. I know this will make the pillow very delicate and the pieces likely to crimp up or fall off over time. So it has been deemed a "show piece" - relegated to the head of the bed as opposed to the sofa.
I used a sturdy floral bakit for the back of the cushion cover. It's a simple envelope so as not to require any zippers or buttons. And because I made this to be a companion piece to my knitted Trio Chevron Cushion, I trimmed my Orimono with a braid made from Rico Designs Cotton DK in mint (available to purchase here).
The best part? This project was completely, entirely, 100% free!
The original.
Saturday, 18 August 2012
Saturday Stitch Session: Openwork Squares
Cast on a multiple of 2 stitches + 2 edge stitches.
skpo = slip 1, knit 1, pass slipped stitch over
Row 1: (Wrong side) P to end.
Row 2: K1, *k8, (yo, skpo) 4 times, repeat from * to last st, k1.
Row 3 - 8: Repeat rows 1 and 2 three times.
Row 9: P to end.
Row 10: K1, *(yo, skpo) 4 times, k8, rep from * to last st, k1.
Row 11 - 16: Repeat rows 9 and 10 three times.
These 16 rows form the pattern.
Friday, 17 August 2012
Pulled Fringe Embroidered Napkins
Tutorial: Pulled Fringe Embroidered Napkins
I actually started this project about 9 months ago! I had embroidered three of the four napkins and then lost steam before the Christmas craftytime rush. Well, there's nothing like moving house to remind you of all your WiPs - Works in Progress. I recently bought an old oak bureau with two large drawers, and I am absolutely determined to try to limit all of my crafting supplies to those two drawers. That doesn't include my wool stash of course.... that plastic storage box is under the bed! But all of my WiPs are taking up too much space so I'm making a concentrated effort to get them completed. Here's the first of my finished projects. Enjoy!
Supplies
- a square of linen-like fabric (four to make four napkins)
- brightly coloured sewing threads
- brightly coloured embroidery threads
- embroidery needles
- an embroidery hoop
- fabric scissors
- a sewing machine
- an iron (optional)
--------------------------------------------------------------------------------------
Step 1: Fold your linen squares in quarters, and embroider a fun design in one of the corners of each napkin. I used a selection of Aunt Martha's iron-on transfers by Colonial Patterns purchased in Texas a million years ago. Be sure to knot your embroidery thread at each end if you plan to wash your napkins in the washing machine.
Step 2: Select a few brightly coloured sewing threads to, not necessarily match, but coordinate with your napkins.
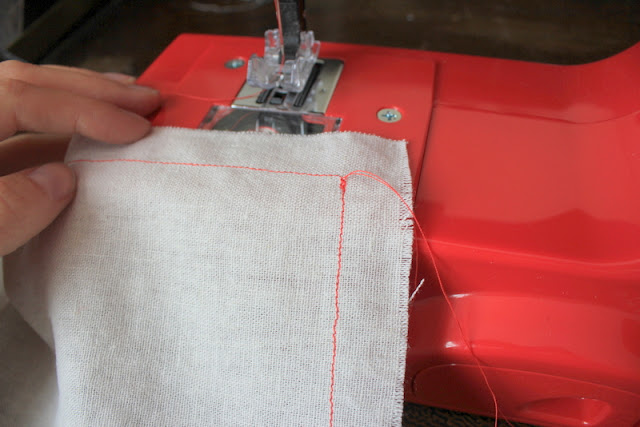
Step 3: Sew a square all the way around one of your napkins - about half an inch from the outer edge.
Step 4: Sew another square approximately a quarter of an inch from the first square. Don't worry if your lines aren't perfectly straight. If you use an inexpensive fabric that is loosely woven (and thus easier to fringe), then it will be just about impossible to keep your lines straight due to the nature of the fabric. That's okay!
Step 5: Using a straight pin or an embroidery needle, gently pull out each vertical thread to create the fringe. Do this on all four sides of your napkin. Repeat the sewing and fringing process on all four napkins, and then iron them stiff with a light starch.
And that's it. Now it's tea time... or cocktail time!
Saturday, 4 August 2012
Saturday Stitch Session: Star Stitch
This is a really simple stitch with an elegant look and feel. It would be great for a summer sweater!
Cast on an even number of stitches + 1 edge stitch.
Row 1: K to end.
Row 2: P to end.
Row 3: K1, k2together to end.
Row 4: *K1, pick up the horizontal thread before the next stitch and k it, rep from * to last st, k1.
These four rows form the pattern.
Friday, 3 August 2012
Crochet at the Coast
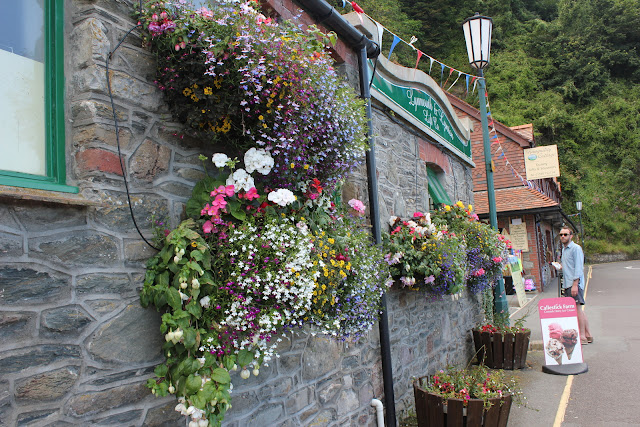
A week ago today, Olly and I were surfing and camping at Croyde Bay in Devon. I wanted to take a very portable, sandproof project with me, so I opted for crochet with cotton. On our way home, we stopped for a hike and an ice cream in Lynton and Lynmouth. We took full advantage of the summer weather, and it's a good thing we did - since summer seems to be over....
1. New crochet
2. Is it really going to be a lampshade cover?
3. B&B in Croyde where we camped
4. Lynmouth - the Switzerland of England
5. Watchout at Lynmouth
6. Seashells by the seashore
7-9. A lift from 1888
8. Olly on the Coastal Path in Lynton
9. A walk through the woods back down
10. Sunset at Croyde
Subscribe to:
Posts (Atom)


